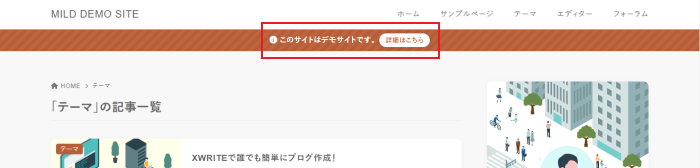
通知エリアについて
カスタマイザーより、サイト全体でお知らせを表示できる通知エリアを設定できます。
ボタンや背景パターンといった細かなカスタマイズも可能です。
通知エリアの設定方法
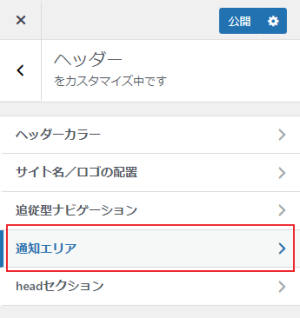
STEP1
「通知エリア」をクリック
カスタマイザーより「ヘッダー」>「通知エリア」をクリックします。
STEP2
各項目を設定する
以下の項目について設定できます。
- 通知エリア
- ボタン
- 背景パターン
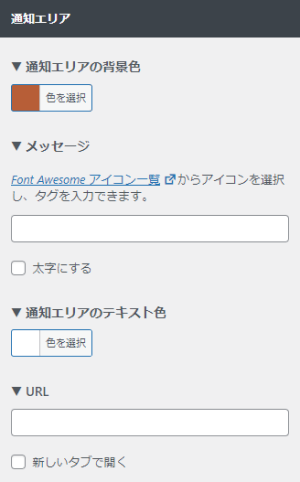
通知エリア
通知エリアのメッセージやURLなどを設定できます。
- 通知エリアの背景色
- メッセージ
- Font Awesome アイコン一覧 からアイコン選択し、タグを入力できます。
- 通知エリアのテキスト色
- URL
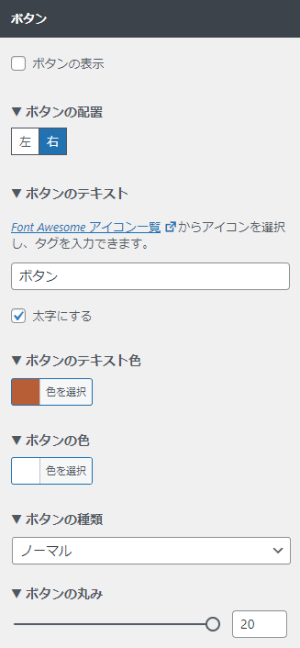
ボタン
ボタンの種類や色を設定できます。
- ボタンの表示
- ボタンの配置
- ボタンのテキスト
- Font Awesome アイコン一覧 からアイコン選択し、タグを入力できます。
- ボタンのテキスト色
- ボタンの色
- ボタンの種類
- ボタンの丸み
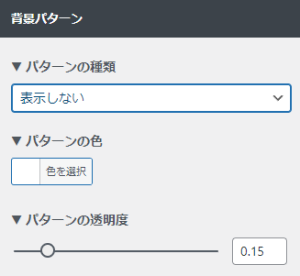
背景パターン
背景パターンの種類や色を設定できます。
- パターンの種類
- パターンの色
- パターンの透明度
STEP3
設定後「公開」をクリック
設定後、「公開」をクリックすると完了です。